Hello, Let's start!
This will be the first blog post where we plan to regularly bring you the best practices of working with Motioncube.
Today I'll show you the shortest and easiest way to get started using Motioncube on your interactive floor. We will show you how to run the free Motioncube 3D Fish application on the floor surface using depth cameras.
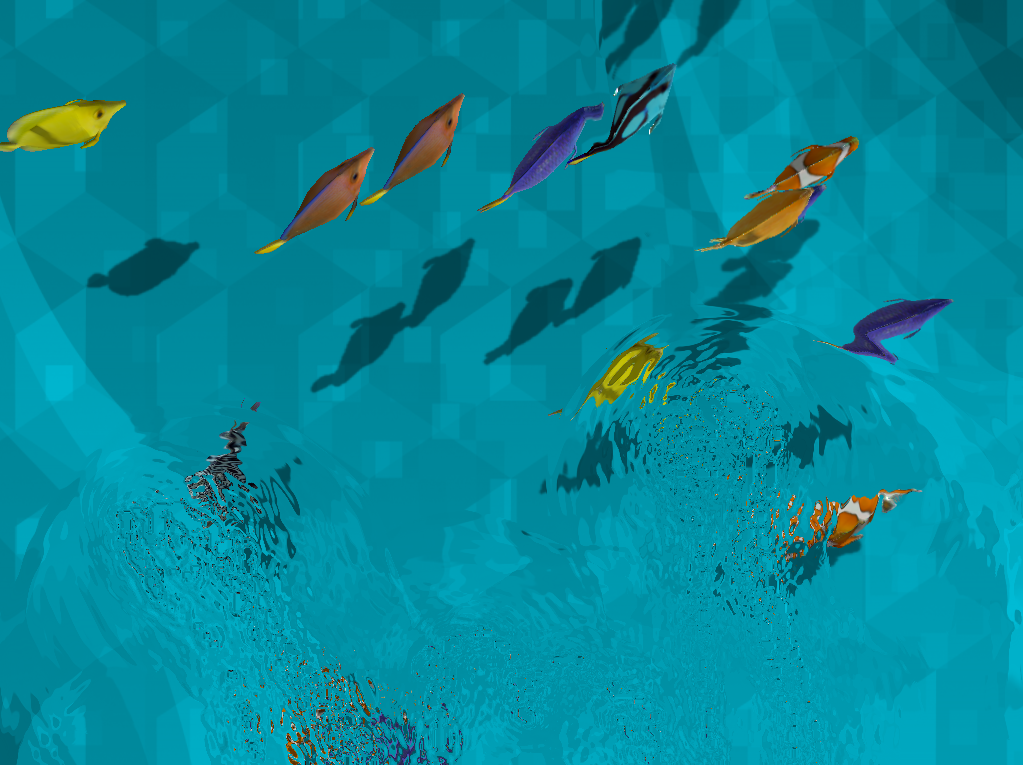
The goal for today's post is to get a similar result, as shown below.
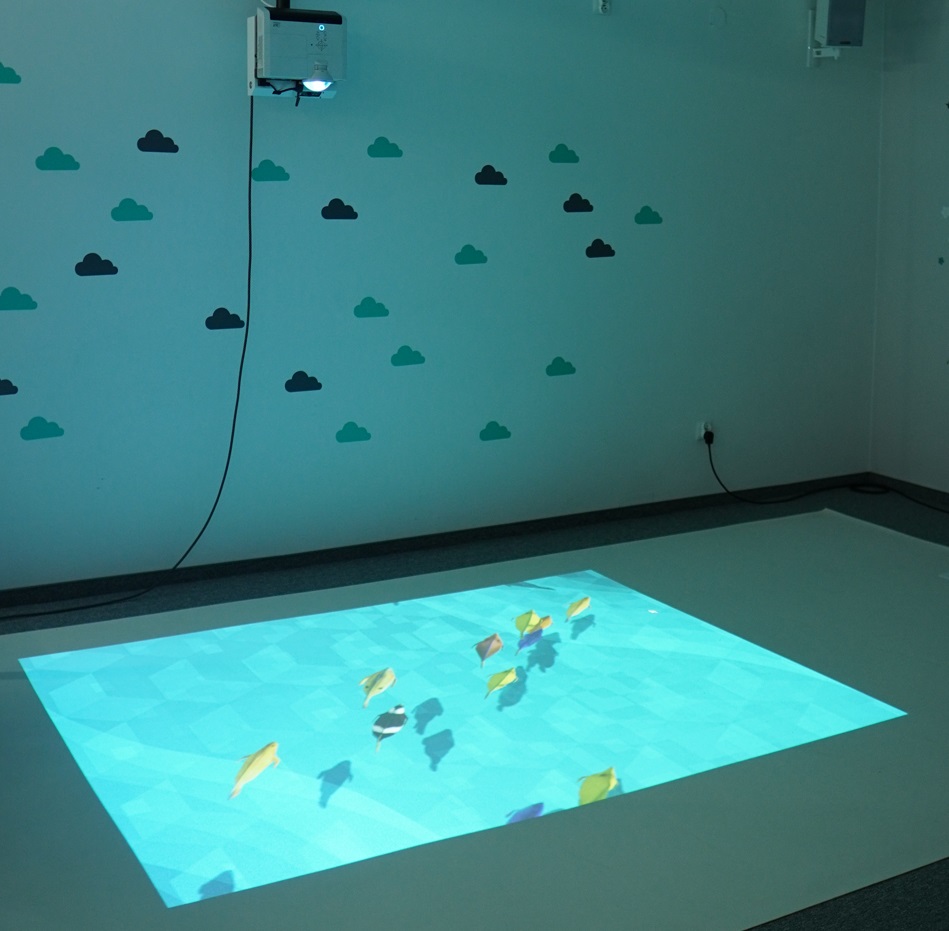
Interactive Motioncube 3D Fish projected on the floor
What you will need:
- a computer with Windows 10 or later (see minimum requirements),
- one of the supported depth cameras: Microsoft Kinect 2, Intel Realsense 2 (e.g. D435) or Orbbec Astra (e.g. Pro, Pro Plus or standard) (read more about Motioncube support for depth cameras),
- a projector (not required to do a quick test of the application),
- Motioncube Player latest version,
- an account in the Motioncube Store.
Do it as follows:
1. Prepare a computer with Windows 10 or later and connect with your depth camera
We recommend using Orbbec Astra (Astra, Astra Pro, Astra Pro Plus) because, in our tests, it gives better results than Kinect 2 and Intel Realsense. The Orbbec Astra cameras are also under active development and available at a lower price than Kinect and Realsesne. I will make a dedicated post about depth cameras and present our observations there.
Mount the camera next to or above the projector (depending on the size of the displayed screen). Both devices shall face the surface where you will be testing. The projector is not required for the first test, as you can observe the experiment on your computer screen. In that case, just place the camera above your display so that it faces you.
Use the camera manufacturer's software to check if the camera is working - whether it gives a stable signal without interference. If the camera is not directly connected to a computer, you may use an active cable or USB HUB with the additional power supply. This will provide enough power for the camera.
Set the camera so that it can see the entire image displayed by the projector (it can see more - we will calibrate the camera later using Motioncube). If you do not have a projector, you can perform a simplified motion test (e.g. by waving your hand in front of the camera) to initially assess whether your move is detected and whether the Motioncube 3D Fish app meets your expectations.
2. Download the latest version of Motioncube Player and test your camera
A Motioncube account is not required at this stage. First, check if the Motioncube handles your camera and working environment correctly.
Download the Motioncube-installer.
- Run the installer and go through the installation process.
- Launch Motioncube using the shortcut found in the Windows Start Menu.
- Select a language and accept the license. You may skip logging in this time.
- Select
Interactive Projection. ThenInteractive Floorand tickMotion Interaction. These options will be enough to get you started. You'll be able to change it later.
If a popup appears with the Interactive Projection Wizard, you can skip it because it does not yet support depth cameras.
Now you will integrate your camera.
- Go to
Menu > Settings > Advancedand enter the service mode. - Then click on the
Cameratile and expand the list in theSelect devicesection. - Click on
Configure supported devices. - In the list, select the type of camera you have connected to the computer (you can choose several options if more cameras are connected).
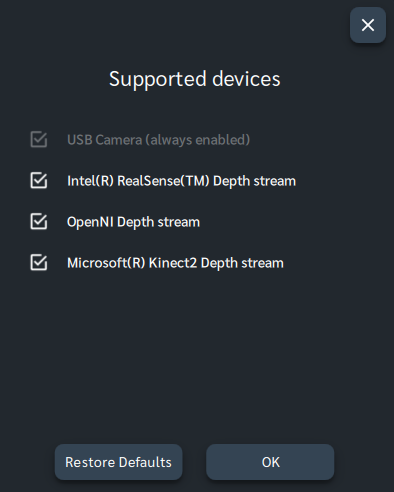
After clicking OK, Motioncube will refresh the camera list. See if the depth camera you have connected is on the list. If Motioncube does not see your camera, check again that the camera view is visible in the hardware manufacturer's software without interruption.
Select the depth camera you want to test from the list - they have "(Native support)" added. Wait for the camera to initialize and see if the image preview appears.
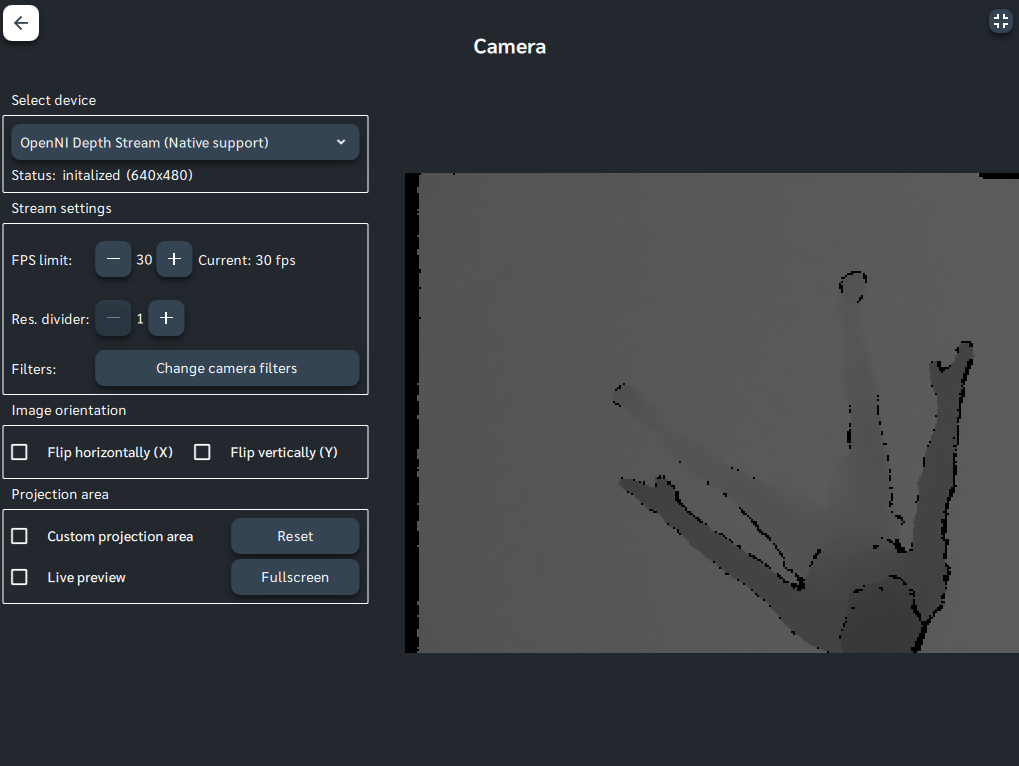
If you can see the camera preview, you can perform additional experiments.
(a) You can experiment with the range the camera sees. Select Change camera filters and use the sliders to limit the field of view to cut out the visibility of the floor (it will change from grey to black).
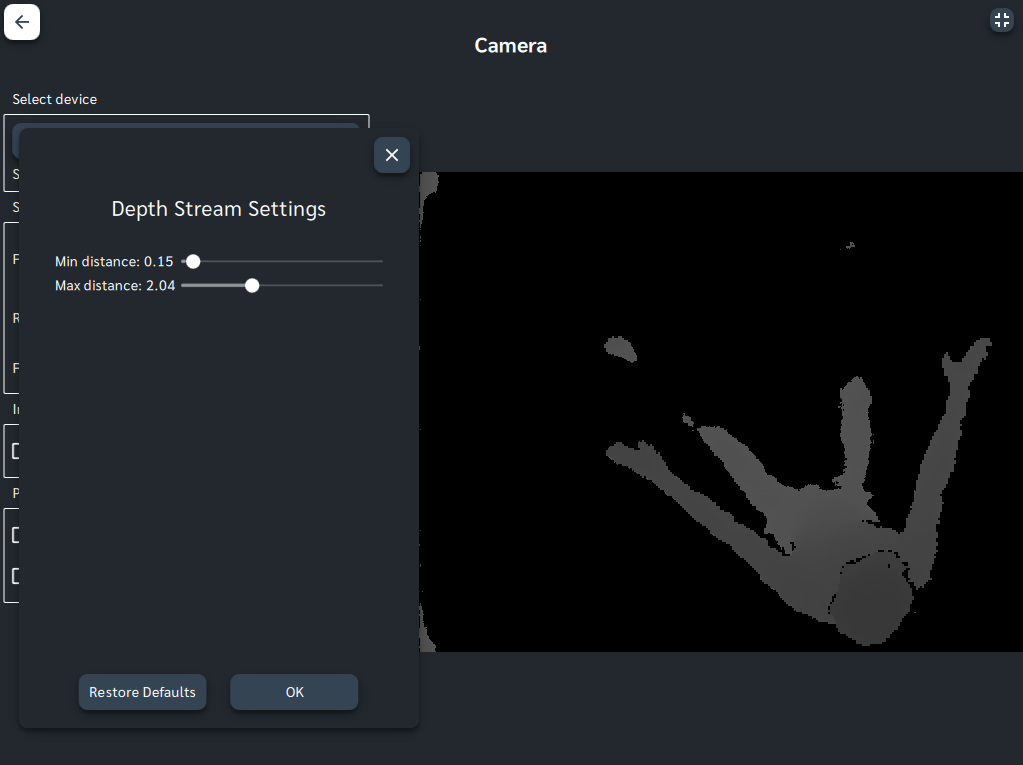
As you can see in the preview, for a person sitting on the floor, removing the visibility of the floor also results in partial loss of important information, i.e. parts of that person's legs.
So let's reset these values to the initial state so that the full range of the image is observed at this stage - Motioncube, as we will see later, can handle this.
(b) It is now worth slightly narrowing down the area that will be taken into account by the image processing algorithm. This is because the edges of the depth image are not stable and generate excessive noise.
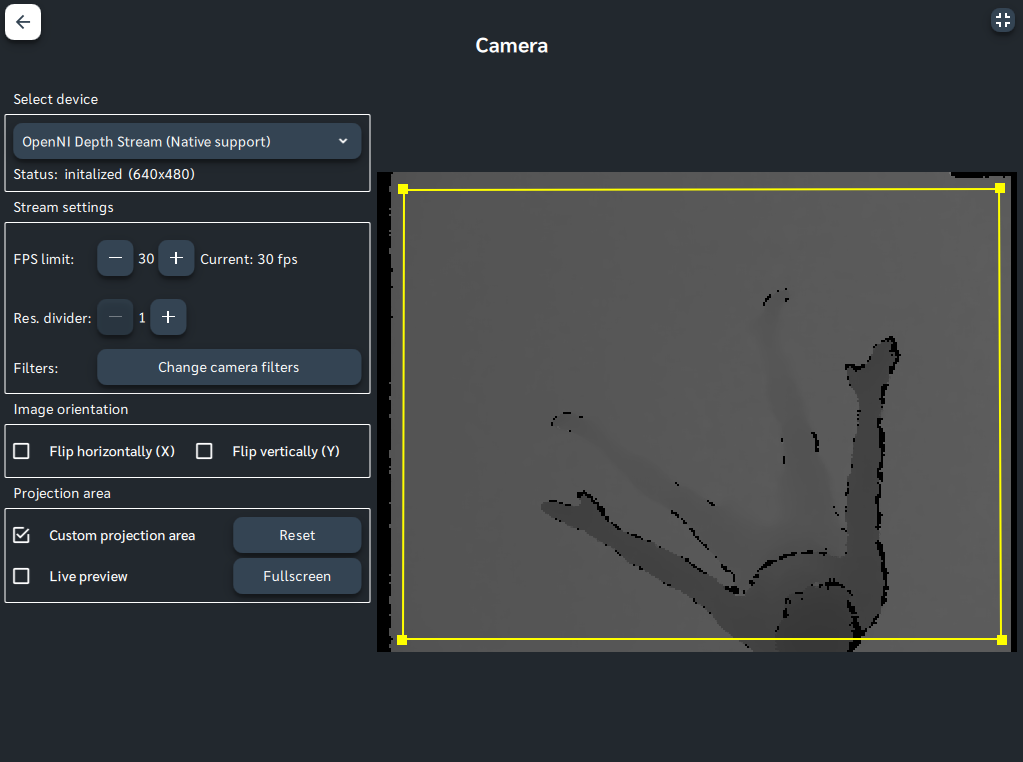
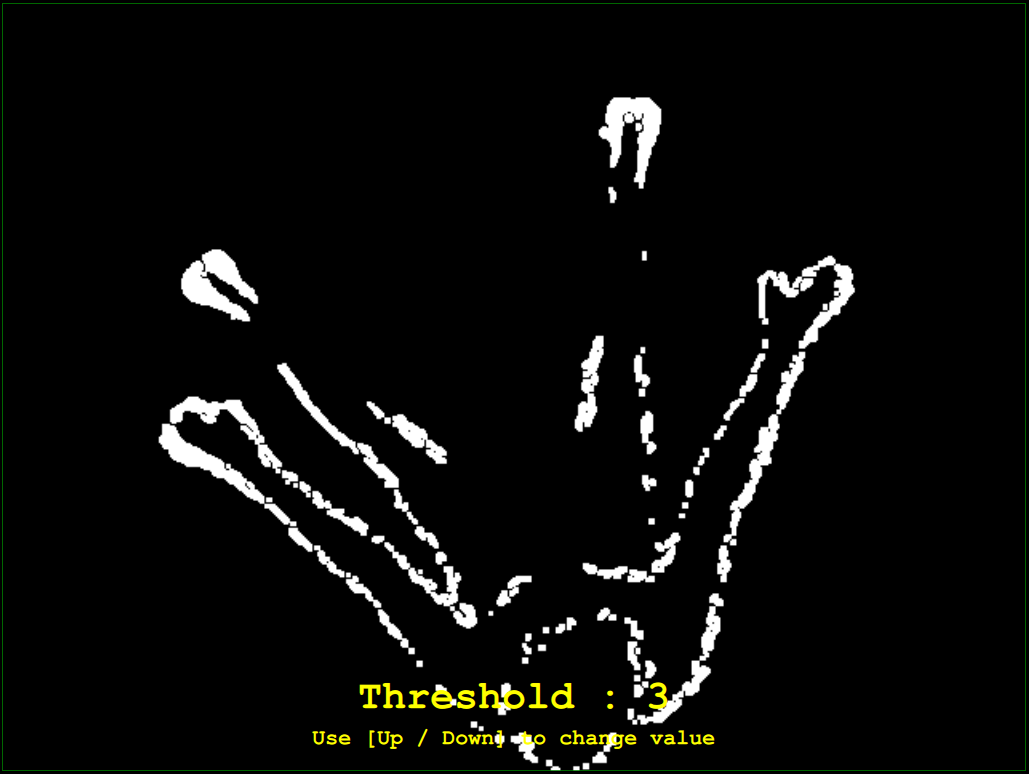
(c) Go to Full screen mode (in the Projection area section) to test the motion detection. Use the [Delete] key to preview the motion detection.
Step off the projection surface and remove other elements so the camera only observes the empty floor. Use the up/down arrow keys to set the motion detection sensitivity to the lowest possible value, for which you will see a black image without distortion. Then step on the floor and see if your movement is detected.
If all tests have been passed successfully so far, you can proceed with step 3 below.
3. Create a Motioncube account, install and launch the Motioncube 3D Fish app
In the menu on the motioncube.io website, click the Login button and go to the Motioncube account creation form, which is required to download the free Motioncube 3D Fish application.
After creating an account, restart Motioncube Player and log in to your Motioncube account.
Then click on Menu Application store > Applications. In the search box, type 'motioncube 3d fish'. Install the app that appears. No fees are charged.
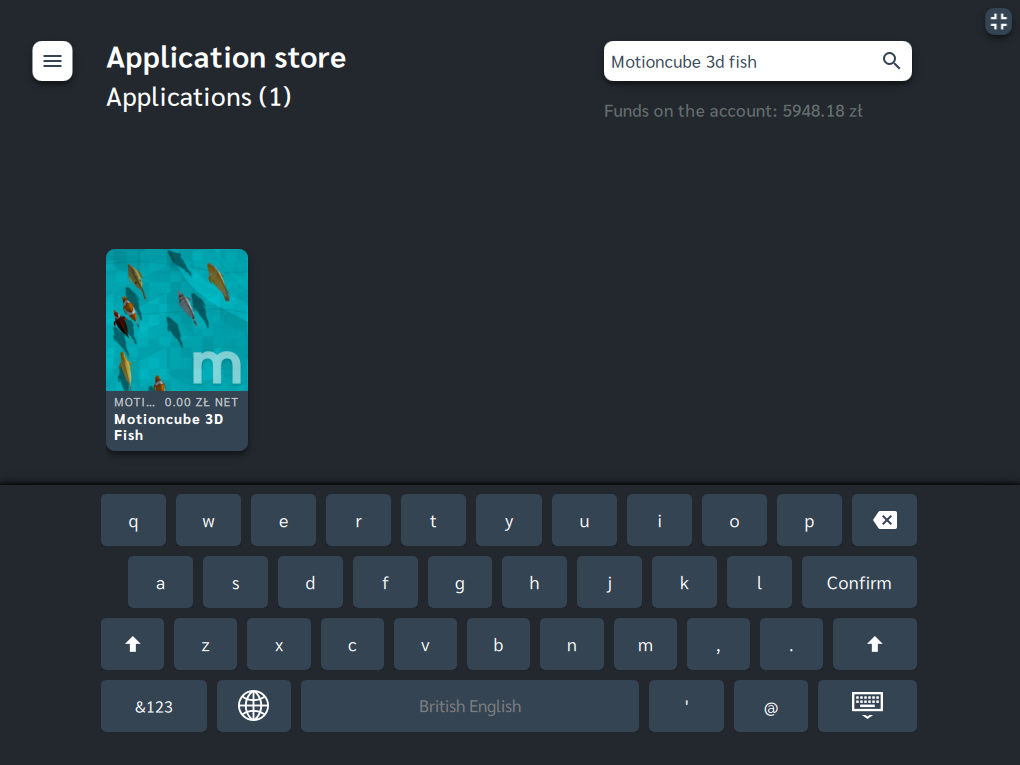
After installation, launch the application.
When the interaction area is empty, fish will swim freely, and the water will not be waving.

When you move on the floor (or wave your hand in front of the camera), you will see the waves on the water's surface. The fish will startle and change their direction when your movement is detected.
4. Prepare installation setup
All the tests so far you could do without a projector. However, it's time to connect all the hardware components and perform the fully integrated test.
Mount the projector so that it faces the same surface as the camera. There are many ways how to do this. Some are described in our Help Center on the Working Environment subpage.
Below you can see our interactive environment for testing.
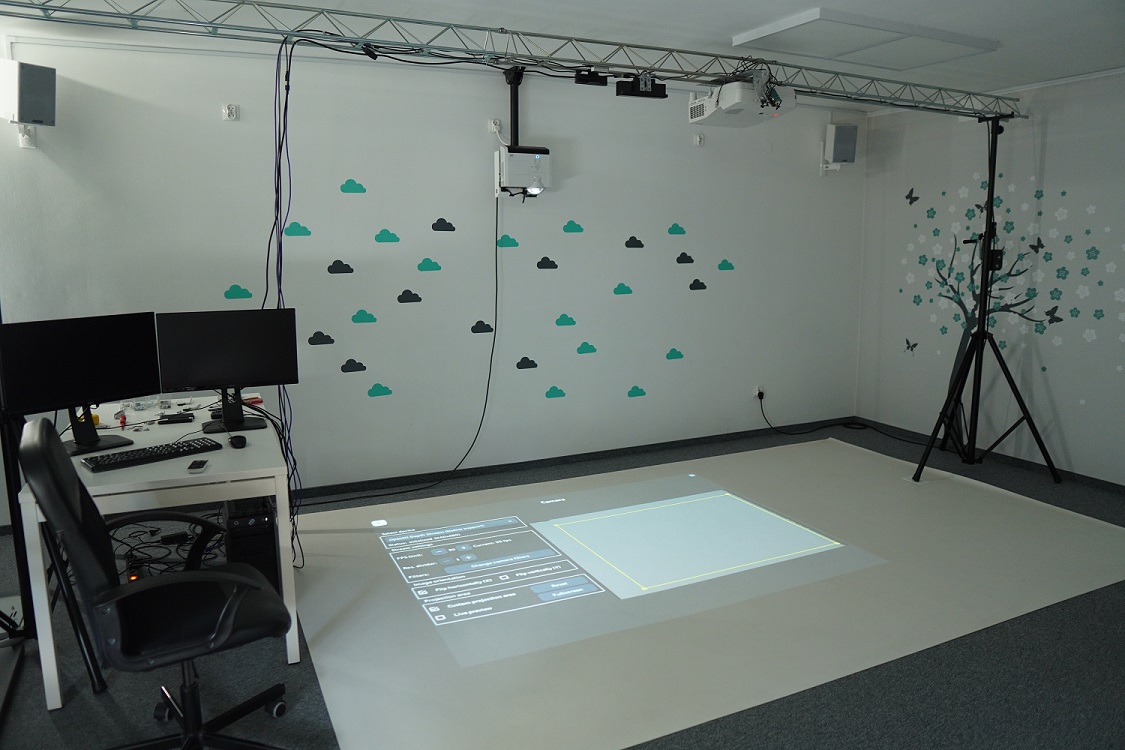
Motioncube interactive installation for testing
Below you can see how we installed the cameras. We used a lighting ramp that allows you to mount any elements to the frame.
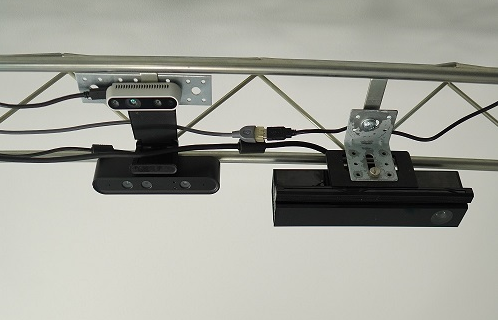
Depth cameras for testing mounted to the frame
5. Calibrate the projection area accurately
Calibrate the interaction area directly on the floor. Position the corners of the projection area to coincide with the image projected by the projector. Grab the yellow squares with your mouse cursor and drag them to the right place.
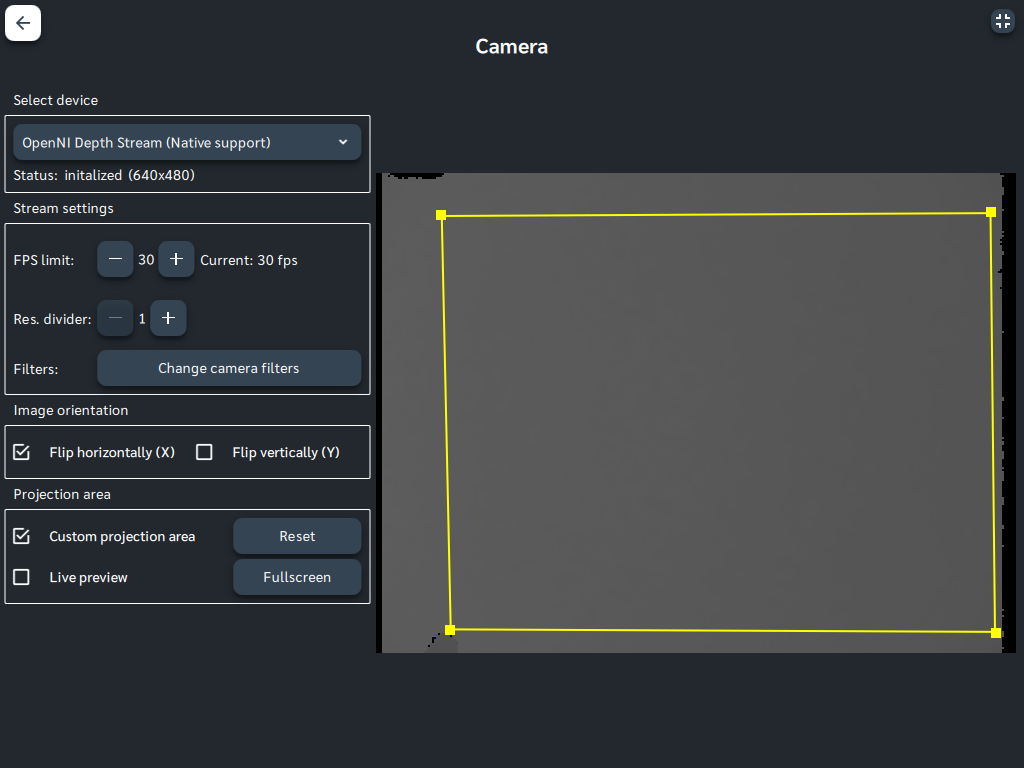
Calibration of the interaction area
Once you have set the projection area, check the motion detection by selecting Fullscreen, then press the Delete key.
6. Final test
Now you can test the "Motioncube 3D Fish" app on the floor. As a reminder, you will find the app in Menu > My Library > Applications.
See how it works with us:
I hope the post was helpful to you. In case of problems with integration, contact us, and we will help you solve them.
Rafal from motioncube.io
